
Why build my own roof top tent when there are so many on the market?
Answer: none of the options available on the market suited my needs, and believe me I did a looked long and hard.
I am not a carpenter, builder or anything like that.
I am a girl who loved hanging out with her dad in his workshop, and picked up a love of 'having-a-go' at anything.
Join me here as I share my ''journey' into making my own roof top tent
What were my requirements?
My requirement | What the market offered | My solution |
Retain storage space on my roof rack for spare fuel canisters and self-recovery gear | Most hard-shell roof top tents (lets abbreviate that to HSFTT) took up the entire roof space. The few options with a smaller footprint did not meet my other requirements. | Designed a HSFTT that was approx. 1200 wide by 1200 long, leaving me approx. 800mm of roof rack space free. |
Storage of paddleboard and kite-surfing-gear-bag on the roof of the HSFTT | Most commercially available HSFTT did not come with a robust roof rack system. Those that did, did not meet my other requirements | Built a light weight but strong roof rack system. Custom positioning of racks to suit my storage needs |
Profile & weight, I wanted as low a profile as possible and of course as light as possible. | Many of the commercially available HSFTT were remarkably heavy, considering they are mostly made out of plastic etc.
Many of the commercial options have quite a high profile | My construction materials were relatively heavy, being plywood. I am not certain how much the finished product weighed, but I think it is around 50kg without bedding – so significantly lighter than most the commercial options. Possibly as I store my ladder separately (inside my vehicle). While the profile of the one I built is not super low, it is 50mm lower than many of those on the market |
Cost – I wanted to spend as little as possible to get the best possible product (don’t’ we all). I would happily have spent a few thousand if I was getting what I wanted, but was reluctant to spend that much on a product that was not actually meeting my requirements. | The prices of various HSFTT that I was looking at when investigating this (June/July 2022) were as follows:
Ikamper $3,299 | My costs (approx.): Plywood x 2 sheets $150 Epoxy Resin $230 Sanding paper $20 Masking tape $20 Struts $97 Second hand tent $100 Paint $34 Ladder $99 Wood glue & screws $25 Mattress $159 Sewing bits' bobs $30 Total $964 |
Research

I benefited greatly from the YouTube video's that others before me had uploaded, most particularly Patrick Remington who has a fabulous series on how to build a hard shell roof top tent.
Thank you so much Patrick for your generosity in taking the time to create and share that video series!
There were quite a few other video's, available to watch and I learnt something from them all.
I also watched a lot of marketing video's from the various commercial firms to learn how their products opened, what catches they used, how they secured their ladder, their tent design etc. etc.
Design challenges
One of the issues for me is that I could not simply copy a sample design such as Patrick's as my design was quite different - it was to be side opening with a fold-out-platform.
In many ways it is a hybrid between the standard soft shell roof top tents that fold out, and the more traditional clam-style hard shell roof top tent - and figuring out how to make it work definitely fried a few brain cells!

The build
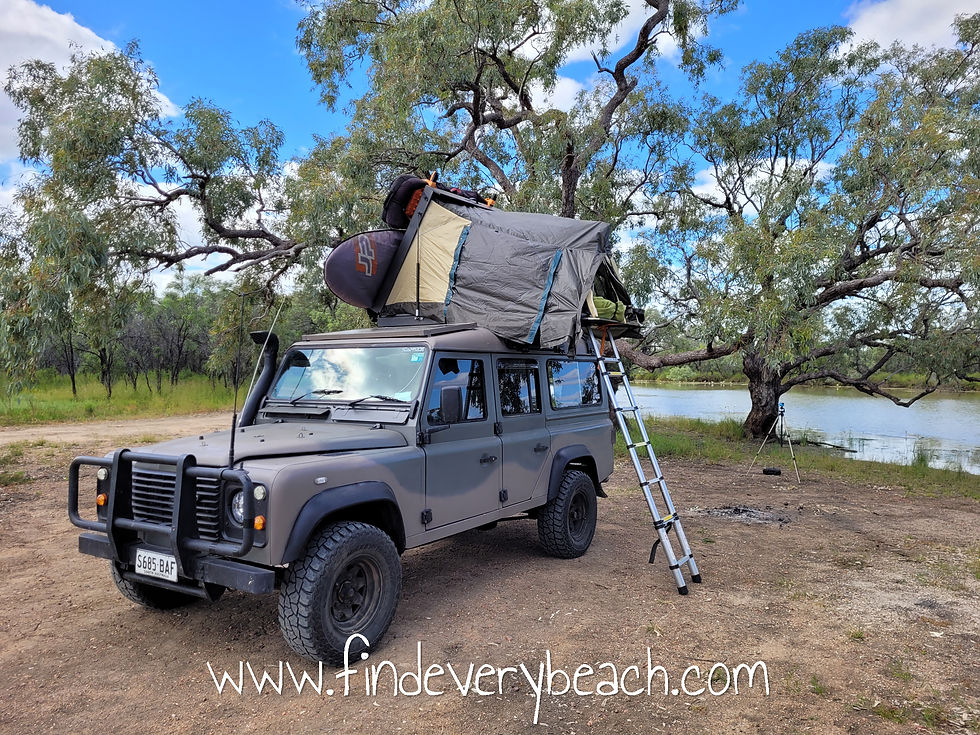
I will let the images here tell the story


The hinges
How on earth I was going to get the fold-out platform to hinge was a true mystery to me.
I mentioned this to a friend and he found some images for me, and then I also found a video from Patrick Remington that also showed the hinges.
I decided to try making them myself and a trip to the local engineering shop provided me with the perfect material - aluminum tubing which I would cut into the appropriate shape.
My fabulous neighbour had a hand held grinder and I purchased specific aluminum cutting disks for the task.


I was very pleased at the outcome of my 'light engineering'.

And here they are installed.
I did have to adjust the design slightly to allow the top of the box to close over them, as they were sticking out initially.

The tent
I had marvelously ambitious ideas for how the tent would look, and I hope to make those ideas real in my next version of the canopy.
But for this 1st version I was limited by not having access to fabric, zips and other materials - this little outback down has a lot of things - but not rolls of tent fabric/canvas.
I know I could have bought some online, but I really wanted to see and feel the fabric - something you really can't do with online shopping.
Instead I chose to buy a near new second hand tent, that already had mesh, zips, waterproof fabric and various other elements I could use in this project.
Converting that dome shaped tent into a canopy to suit the frame I had built was quite challenging, but given the restrictions I was working with I am actually quite pleased with the outcome.


The build - the video - here it is


Great to meet you at Bramwell station.and check out your amazing Lulu. Looking forward to seeing more posts